Workbenches and vises: heights, tops and choosing the right vise
How to pick a workbench height and top, what load ratings mean, and how engineer's vises differ from woodworking face and end vises, with mounting tips.
A solid workbench makes nearly every job easier and safer: work stays put, tools are at a comfortable height, and you're not balancing a project on a pair of trestles. Choosing one means deciding on height, size, top material and, just as important, how you'll hold the work. This guide covers the main types of bench, what to look for in a top, and how metalworking and woodworking vises differ.
Types of workbench
| Type | Best for | Watch out for |
|---|---|---|
| Steel-frame garage bench | General DIY, mechanics, storage underneath | Thin tops flex; check the load rating |
| Woodworking bench (solid timber top) | Hand-tool work, planing, joinery | Heavy; needs vises and dog holes to be useful |
| Folding or portable bench | Small spaces, site work | Light; less stable under heavy force |
| Wall-mounted folding bench | Narrow garages | Wall and fixings must carry the load |
| Mobile bench on casters | Shared spaces, moving to the job | Locking casters must hold firmly |
| Multifunction clamping table | Power-tool work with track saws and routers | Less suited to heavy pounding |
Most home workshops start with one general-purpose bench. If you do a lot of woodworking and metalworking, separate benches, or at least separate vises, avoid filings in your timber and glue on your engine parts.
Getting the height right
The right height depends on you and on the work. Common rules of thumb:
- Hand-tool woodworking (planing, sawing): a lower bench, often around the height of your wrist or palm with your arms hanging by your sides. That lets you put body weight behind a plane.
- General DIY and assembly: somewhere between hip and waist height.
- Detailed work (electronics, carving, fine fitting): higher, so you don't hunch over.
- Metalwork with a vise: many people like the vise jaws at around elbow height for filing.
Many commercial benches are roughly 86–97 cm (34–38 in) tall. Adjustable-height legs are worth considering if several people share a bench or you do varied work. If a bench is too low, raising it on sturdy blocks is easier than lowering one that's too tall.
Depth is typically 60–75 cm (24–30 in); deeper than that and you can't reach the back. Length depends on your space and projects, but a longer bench makes it easier to support long boards.
Choosing a benchtop
| Top | Pros | Cons |
|---|---|---|
| Solid hardwood (beech, maple) | Durable, flat, can be planed flat again, holds dog holes well | Heavy and costly |
| Butcher block (laminated strips) | Tough, attractive | Can move with humidity; needs sealing |
| Plywood or MDF, often doubled | Inexpensive, flat, easy to replace | MDF dislikes water; edges dent |
| Steel | Heat-resistant, good for metalwork and welding prep | Noisy; marks delicate work; can rust |
| Laminate or composite | Easy to clean | Slippery; can chip |
A sacrificial layer, such as a sheet of hardboard screwed on top, protects a good bench and can be replaced when it's worn. Never weld on a timber bench; our guide to choosing a first welder covers setting up for metalwork.
Load ratings and stability
Steel-frame benches often quote a load capacity, usually for weight spread evenly across the top. That's useful for comparing benches, but it doesn't tell you how the bench copes with hammering or with a heavy engine part placed on one corner.
For stability, look for:
- A rigid frame with cross-bracing or a lower shelf that ties the legs together.
- Enough weight that the bench doesn't walk across the floor when you plane or saw.
- Levelling feet for uneven garage floors.
- Locking casters on mobile benches that lock both rolling and swivelling.
A lower shelf or drawers add weight and storage; our guide to tool storage covers cabinets that can sit alongside.
Engineer's (bench) vises
An engineer's vise, often simply called a bench vise (or a vice in British English), has metal jaws and bolts to the top of the bench. It's the standard vise for metalwork, mechanics and general DIY.
What to check:
- Jaw width, commonly around 100–150 mm (4–6 in) for home workshops.
- Jaw opening and throat depth, which limit the size of work it can hold.
- Body material: grey cast iron is common on lighter vises; ductile iron or forged steel is more resistant to cracking under shock.
- Swivel base to turn the vise to a convenient angle.
- Replaceable jaws and an anvil area for light hammering.
- Pipe jaws below the main jaws, useful for round stock.
Use soft jaw covers (aluminium, plastic or rubber) to protect finished parts. Don't extend the handle with a pipe for extra force or hammer on parts of the vise that aren't meant for it; both can crack the body.
Woodworking vises
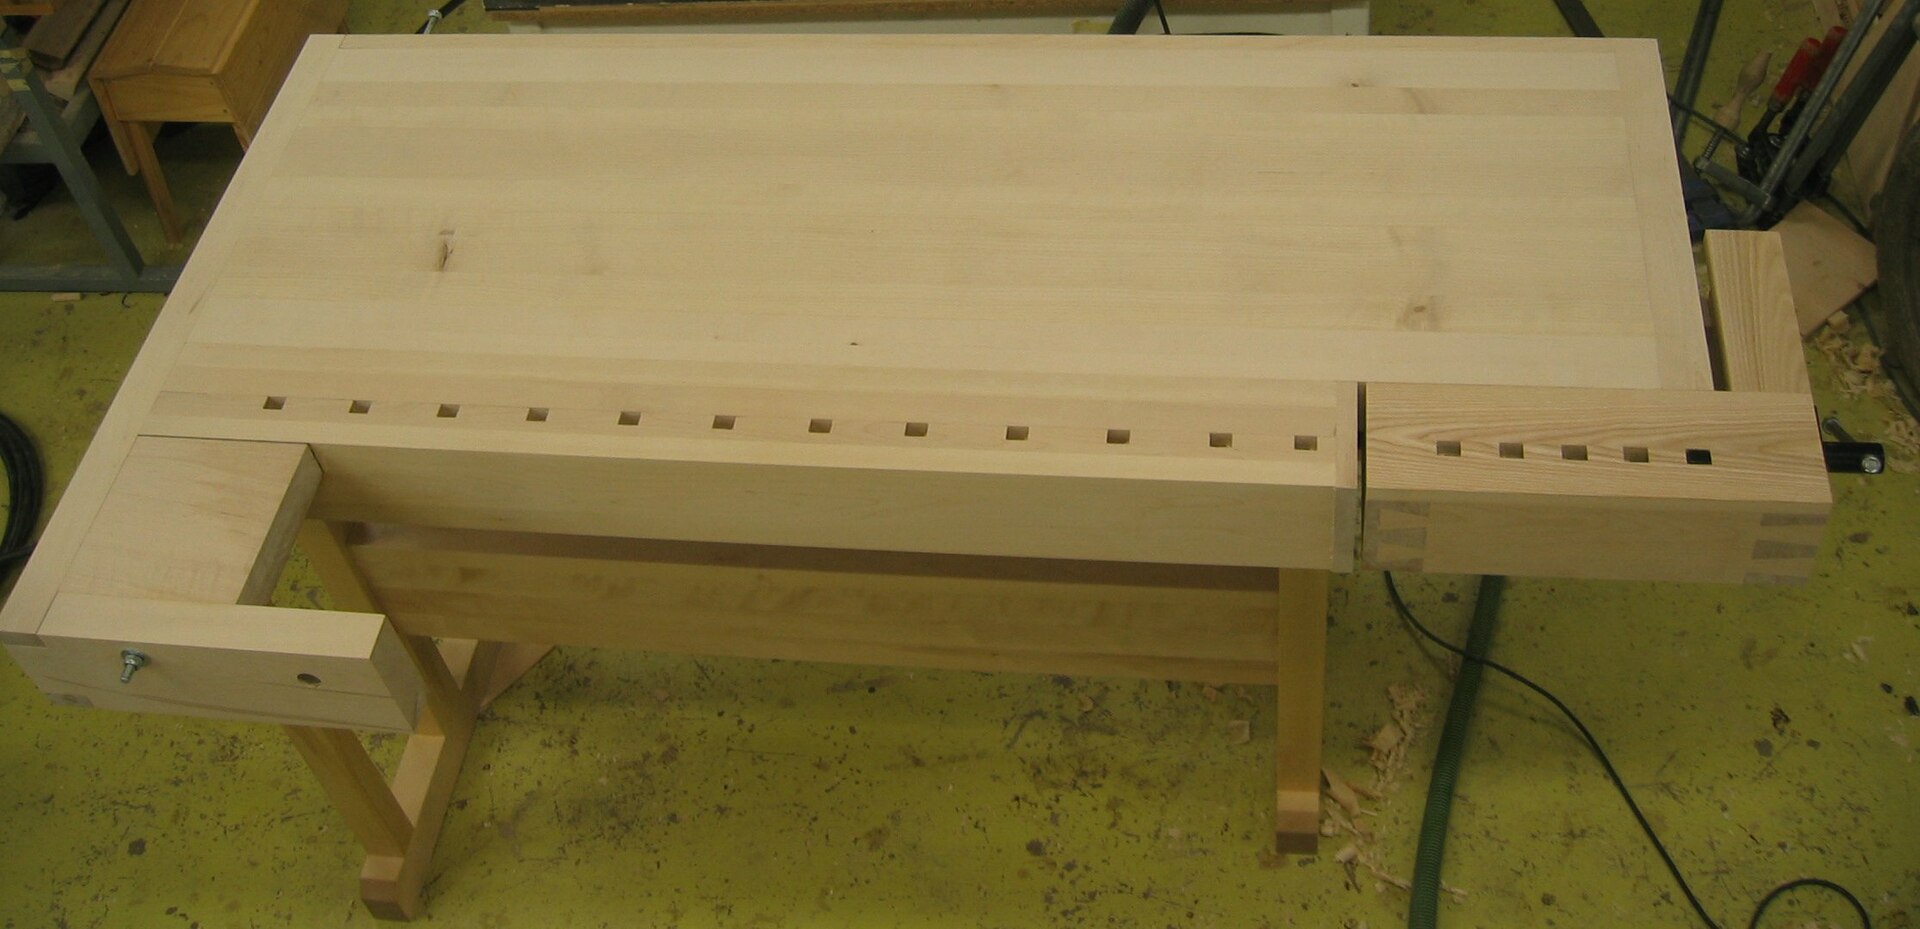
Woodworking vises have wide, flat jaws, usually lined with timber, and mount so the jaws sit flush with the benchtop. That lets you plane a board's edge or face without the vise getting in the way.
- Face (front) vise: mounted on the front edge, the main vise for holding boards on edge, sawing and chiselling.
- End (tail) vise: at the end of the bench, used with bench dogs (pegs in holes across the top) to clamp boards flat for planing.
- Quick-release mechanisms let you slide the jaw open without winding the screw all the way.
- Leg vises and twin-screw vises are traditional designs favoured by hand-tool woodworkers for strong, wide clamping.
- Bench-top vises (such as a Moxon-style twin-screw vise) clamp onto any bench to raise work for dovetailing.
Dog holes are commonly 19 mm (3/4 in) or 20 mm in diameter; check which accessories you plan to use before drilling. Holdfasts, which wedge in dog holes, are a simple, fast way to pin work down. If you'll be routing on the bench, see our guide to wood routers.
Mounting a vise properly
- Bolt through the benchtop with washers and nuts rather than using wood screws, especially for an engineer's vise.
- Mount it over a leg if possible, where the bench is stiffest.
- Let the fixed jaw overhang the edge slightly so long work can hang down clear of the bench.
- Check that the bench is heavy or anchored enough not to tip when you lean on work in the vise.
The short version
- Choose a bench type for your main work: steel frame for DIY, solid top for woodworking.
- Set height to the work: lower for planing, higher for detail work.
- Pick a top you can protect or replace; don't weld on timber.
- Check load rating, bracing and weight for stability.
- An engineer's vise for metal, a face vise and dogs for wood.
- Bolt vises through the top, ideally over a leg.
Bloiq is reader-supported. Some links may earn us a commission; it never affects what we write. How we make money.
Cover photo: user:Emhoo~commonswiki, CC BY-SA 3.0, via Wikimedia Commons