Stud finders and laser levels: how they work and how accurate they are
Magnetic versus electronic stud finders, line versus rotary lasers, and what accuracy figures really mean when you hang shelves, cabinets and tile.
Hanging a television, a row of kitchen cabinets or a gallery wall comes down to two questions: where is something solid to fix into, and where is level? Stud finders and laser levels answer those questions quickly, but each type has limits that the packaging rarely mentions. This guide explains how they work, how accurate they are, and how to avoid the classic mistakes.
How walls are built, and what you're looking for
In timber-framed walls, drywall or plasterboard is fixed to vertical studs. In North America these are usually spaced 16 in (406 mm) apart, centre to centre, sometimes 24 in (610 mm). In the UK and much of Europe, spacings of 400 mm or 600 mm are common. A typical wood stud is about 1-1/2 in (38 mm) wide on its face.
Once you find one stud, measuring along from it is often the quickest way to locate the next. But older houses, window and door openings, and extra framing around corners all break the pattern, so always confirm.
Magnetic stud finders
A magnetic stud finder contains a strong magnet that detects the steel screws or nails holding the drywall to the studs.
- Pros: no batteries, very cheap, hard to fool, and it finds the exact line of fasteners, which is the stud.
- Cons: slower, since you're searching for small points; it also finds stray nails, corner beads and metal plates; and it's little use on thick plaster or where fasteners are sparse.
It's an excellent backup to confirm what an electronic finder tells you.
Electronic stud finders
Electronic (capacitive) stud finders sense changes in density behind the wall surface as you slide them along.
- Edge-finding models signal when they cross the edge of a stud; you mark both edges and find the centre.
- Centre-finding and multi-sensor models use several sensors to show the whole stud width at once, which is faster and less prone to error.
- Deep-scan modes read through thicker surfaces, typically up to around 1-1/2 in (38 mm), at the cost of precision.
Electronic finders need calibrating: most calibrate the moment you switch them on, so place them on the wall away from a stud before pressing the button. Starting over a stud gives false readings.
They struggle with:
- Lath and plaster, which is dense and uneven
- Textured walls, tile and panelling
- Foil-backed insulation or plasterboard
- Damp walls
- Metal studs (they often detect them, but fixing into steel studs needs different fasteners)
Live-wire detection: helpful, not a guarantee
Many stud finders include an AC detection mode that warns of live wiring. It only detects live, unshielded cables carrying current, and it can miss cables that are deep, switched off, shielded or in metal conduit. It won't find pipes at all.
Before drilling:
- Remember that in many regions wiring runs vertically or horizontally from outlets and switches. Avoid those lines, but don't assume wiring always follows them.
- Avoid drilling directly above or below outlets and switches, and near plumbing fixtures.
- Switch off the relevant circuit if in doubt.
- Consider a dedicated multi-detector or wall scanner for more information about pipes and metal.
To confirm a stud, drive a thin finishing nail or drill a small pilot hole where the hole will be hidden by the fixture.
Laser levels: line, dot and rotary
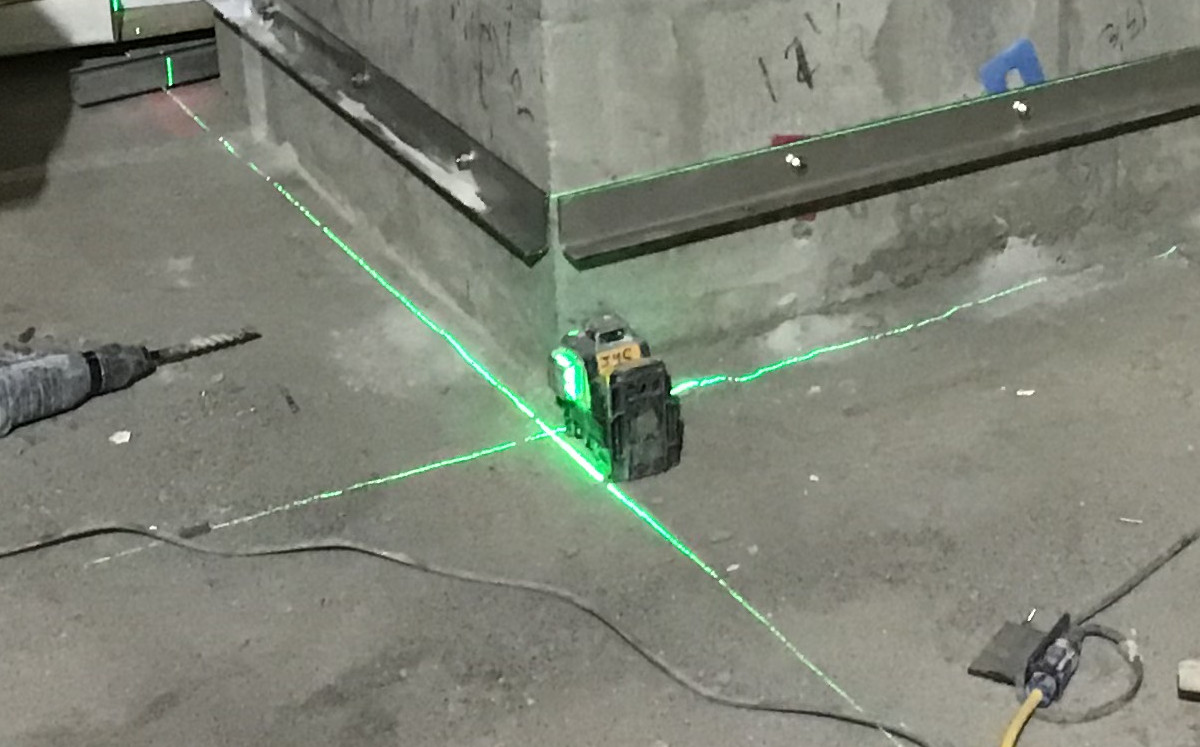
Line lasers (cross-line lasers) project a horizontal and a vertical line onto a wall. 360° line lasers project a line all the way around a room; "3-plane" models project one horizontal and two vertical 360° lines, useful for kitchens, partitions and ceilings.
- Good for: cabinets, tiling, shelving, picture rails, wainscoting and dropped ceilings, mostly indoors.
Dot (point) lasers project two, three or five dots, for example straight up and straight down for plumb transfer from floor to ceiling, plus level and square points. Good for positioning light fittings, walls and posts.
Rotary lasers spin a beam at high speed to create a level plane all the way around, often at long range. Outdoors, the beam is usually invisible in daylight, so you use a detector (receiver) on a staff or rod. Good for fences, decks, patios, drainage slopes, foundations and grading. Many can be set to a slope (grade).
Self-levelling and manual modes
Most modern lasers are self-levelling: a pendulum or electronic system levels the beam automatically when the tool is within a few degrees of level. If it's set up too far off, the laser flashes or beeps to warn you rather than projecting a wrong line.
A manual (locked) mode lets you project an angled line, for stair rails or sloping ceilings. Make sure you switch back to self-levelling afterwards.
Accuracy: reading the specification
Accuracy is quoted as a deviation over a distance.
| Type | Typical accuracy spec | Equivalent |
|---|---|---|
| Line laser | about ±1/8 in at 30 ft | about ±0.35 mm per metre |
| Better line laser | about ±1/16 in at 30 ft | about ±0.2 mm per metre |
| Rotary laser | about ±1/16 in at 100 ft | about ±0.05 mm per metre |
Rule of thumb: multiply the per-metre figure by your distance. A ±0.3 mm/m laser can be about 3 mm off across a 10 m room.
That's fine for shelves and cabinets. Long runs of tile, large floors and outdoor work benefit from tighter tolerances.
Lasers can lose calibration if dropped. A simple check: set the laser in the middle of a room, mark the line on opposite walls, rotate the laser 180°, and mark again. The marks should agree within the stated tolerance. If not, have it serviced.
Red or green, range and batteries
- Green beams appear several times brighter to the human eye than red at the same power, so they're easier to see in bright rooms. They use more battery.
- Visible range indoors varies with room brightness; with a detector, range extends much further. Check whether the laser has a pulse mode for use with a detector.
- Mounting: a 1/4-in tripod thread, magnetic bracket or clamp makes positioning easier.
- Power: many lasers run on AA batteries or tool-platform packs; see our guide to cordless battery platforms.
Laser safety
Most construction lasers are Class 2 or Class 3R devices. Don't stare into the beam, never aim it at anyone's eyes, and take care with reflective surfaces. Keep lasers away from children, and don't view the beam through optical instruments.
The short version
- Magnetic stud finder for cheap, reliable confirmation; multi-sensor electronic for speed.
- Calibrate off a stud, and confirm with a small nail or pilot hole.
- AC detection is a warning, not a guarantee; switch circuits off when in doubt.
- Line laser for indoor jobs, dot laser for plumb and layout, rotary laser with detector for outdoor work.
- Check accuracy per metre, and test calibration if the laser has been dropped. Once you've found your studs, our guide to drills and impact drivers covers the next step.
Bloiq is reader-supported. Some links may earn us a commission; it never affects what we write. How we make money.
Cover photo: MTA Capital Construction Mega Projects, CC BY 2.0, via Wikimedia Commons
,_laser.jpg)