Sanders explained: random orbital, sheet, belt and detail sanders
Which power sander suits which job, how sandpaper grits work, when to move to the next grit and why dust extraction matters for your finish and your lungs.
Sanding is the least glamorous part of most projects and the one that decides how the finish looks. The right sander and the right sequence of grits save hours; the wrong ones leave swirl marks, gouges or blotchy stain. This guide explains the four common types of power sander, how grits work, and how to keep the dust under control.
Random orbital sander: the one most people should own
A random orbital sander has a round pad, usually 5 in (125 mm) or 6 in (150 mm) across, that spins and moves in small eccentric circles at the same time. Because no single abrasive grain follows the same path twice, it leaves far fewer visible swirl marks than older designs, and you can sand across joints where the grain changes direction.
- Good for: almost everything flat or gently curved: tabletops, doors, cabinets, furniture, preparing wood for paint or finish, and light paint removal.
- Discs: hook-and-loop (Velcro-style) discs with dust holes. Match the hole pattern to your pad, as a mismatch blocks the extraction.
- Orbit size: a larger orbit (around 5 mm, 3/16 in) removes material faster; a smaller orbit (around 2.5 mm, 3/32 in) leaves a finer finish. Some models let you switch.
- Limitations: a round pad can't reach into inside corners.
Let the tool's weight do the work. Pressing hard slows the pad's rotation and creates the very swirls the design is meant to avoid.
Sheet (orbital finishing) sander
Sheet sanders have a square or rectangular pad that vibrates in tiny orbits without rotating. The smallest are palm sanders taking a quarter sheet of standard sandpaper; larger models take a third or half sheet.
- Good for: fine finishing, sanding between coats of paint or varnish, and getting into square inside corners.
- Advantage: paper is cheap, as you can cut your own from standard sheets with a punch plate for dust holes.
- Limitations: slower than a random orbital sander, and more prone to leaving small swirl marks if you sand across the grain.
Belt sander: fast stock removal
A belt sander drives a continuous loop of abrasive belt over two rollers. Common belt sizes are 3 × 18 in, 3 × 21 in and 4 × 24 in (roughly 75 × 457, 75 × 533 and 100 × 610 mm).
- Good for: levelling glued-up panels, flattening rough boards, removing thick paint or old finish from large flat surfaces, scribing and shaping edges, and trimming doors.
- Technique: always keep it moving, work with the grain, and lift it off before stopping. A belt sander left in one place will dig a hollow in seconds.
- Limitations: aggressive, heavy and easy to misuse on veneer or thin plywood. Usually followed by a random orbital sander for finishing.
Detail sander
Detail (delta or "mouse") sanders have a small, pointed triangular pad that oscillates.
- Good for: corners, window frames, spindles, louvred doors, and small craft pieces.
- Limitations: slow on large areas; small sheets wear out quickly.
An oscillating multi-tool with a triangular sanding pad does a very similar job, so if you already own one, you may not need a dedicated detail sander.
Which sander for which job
| Job | Best choice |
|---|---|
| General furniture and woodwork | Random orbital |
| Between coats of finish | Sheet (palm) or random orbital with fine grit |
| Flattening boards or removing thick coatings | Belt sander |
| Corners, frames, small pieces | Detail sander or multi-tool |
| Large wood floors | A rented floor sander (drum or orbital) |
| Drywall joints | Hand sanding block or a dedicated drywall sander with extraction |
Understanding grits
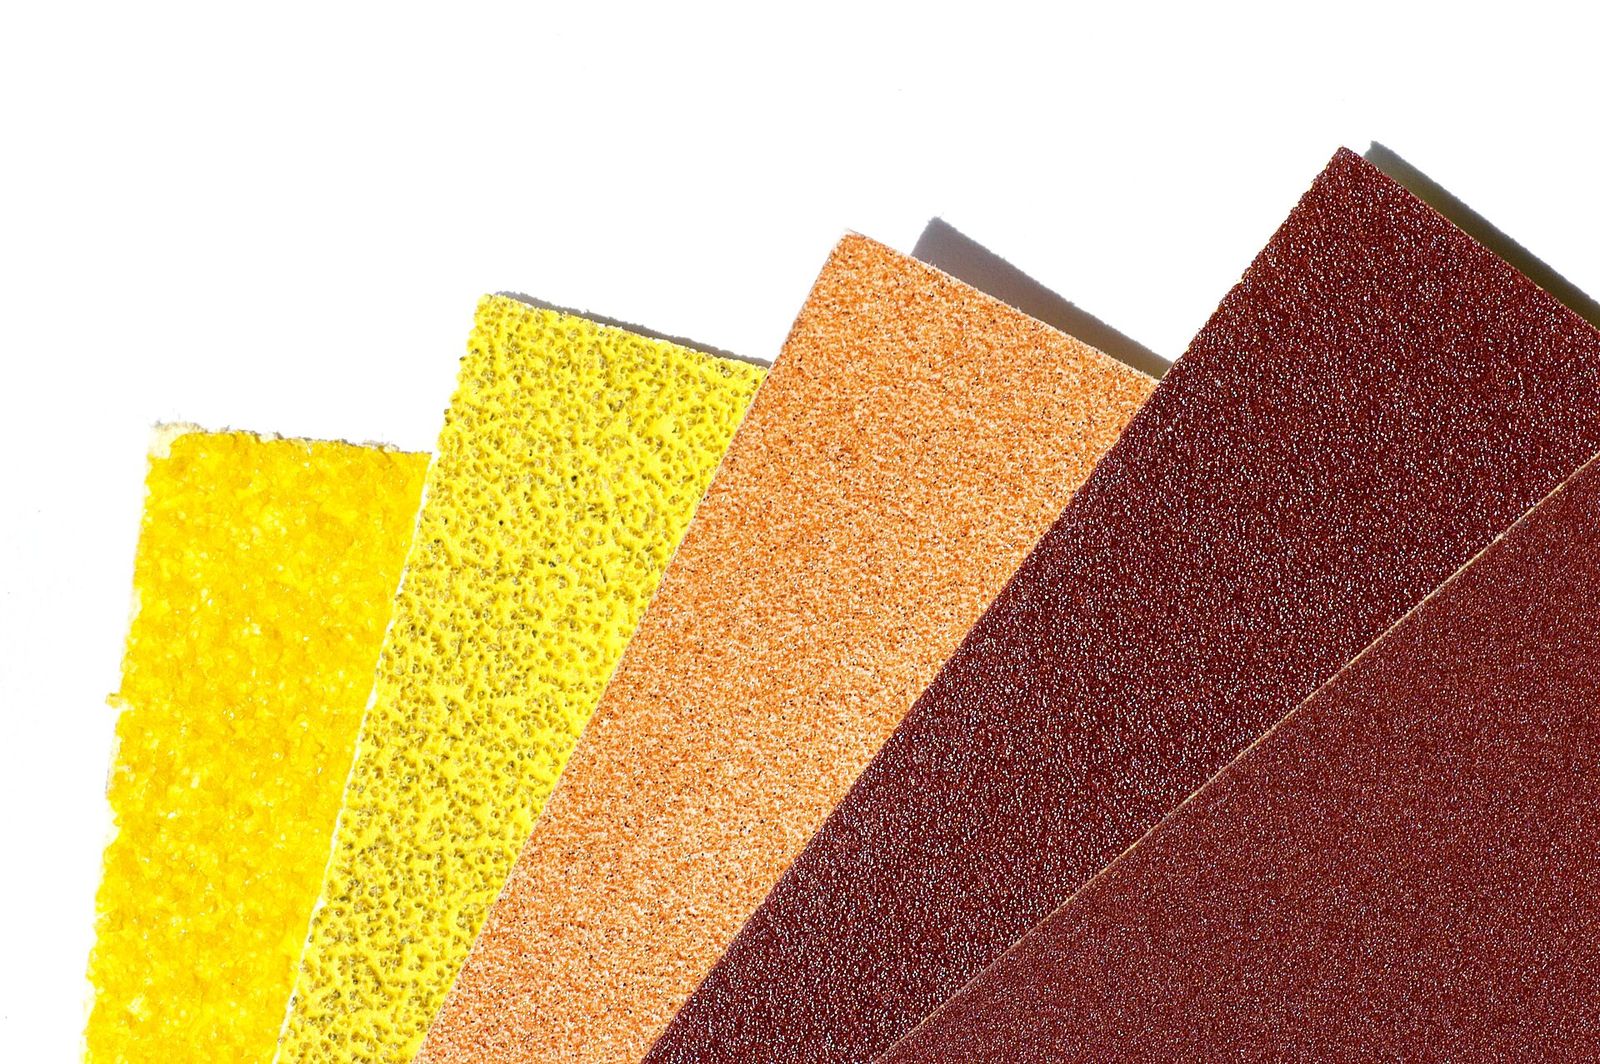
The grit number describes how fine the abrasive particles are: the lower the number, the coarser the paper.
| Grit | Use |
|---|---|
| 40–60 | Heavy removal: old finishes, levelling, shaping |
| 80–100 | Removing machine marks and minor defects |
| 120–150 | General smoothing before finishing |
| 180–220 | Final sanding of bare wood before stain or finish |
| 240–400 | Lightly sanding between coats of paint or varnish |
| 400 and finer | Polishing finishes, often wet-sanded |
Rule of thumb: start with the finest grit that will remove the defect in reasonable time, then work up through the grades without skipping more than one step (for example 80, 120, 180).
Skipping from coarse straight to fine leaves deep scratches that only show once stain or finish goes on. For most furniture, stopping at 180 or 220 is enough: sanding bare wood much finer can reduce how much stain the surface absorbs.
Two grading scales exist. Grits with a "P" prefix follow the European FEPA scale; unprefixed North American grits follow the CAMI scale. They are close up to roughly 220 but diverge at finer grits, so a P400 is not the same as a CAMI 400.
Abrasive materials matter too. Aluminium oxide is the general-purpose choice for wood; ceramic abrasives cut aggressively and last on hard or heavy work; silicon carbide is common on wet-and-dry paper for finishing and between coats. Open-coat and mesh (net) abrasives resist clogging and let extraction pull dust through the whole surface.
Dust extraction: better finish, healthier lungs
Sanding dust clogs abrasives, hides your progress and ends up everywhere. More importantly, fine wood dust is a recognised respiratory hazard, and some dusts, including those from certain hardwoods and treated or painted surfaces, are more harmful still.
- Built-in dust bags and canisters catch the coarse dust but let a lot of fine dust escape.
- Connecting to a vacuum makes a big difference. Most sanders have a port that accepts a hose, sometimes through an adapter. A shop vacuum or extractor with a fine filter works well; some have a power-tool outlet that switches the vacuum on with the sander. See our guide to wet/dry shop vacuums.
- Wear a well-fitting respirator (such as N95 or FFP2 or better) even with extraction, and eye protection.
- Old paint needs care. Paint in older homes may contain lead. Test it before sanding, and never dry-sand paint that might contain lead without proper precautions; check your local health authority's guidance.
The short version
- Random orbital sander first: it handles most jobs well.
- Add a sheet sander for fine finishing, a belt sander for heavy removal, and a detail sander or multi-tool for corners.
- Work up through the grits without big jumps; 180–220 is usually the final grit on bare wood.
- Let the tool do the work, and keep belt sanders moving.
- Connect a vacuum and wear a respirator; test old paint for lead before sanding.
Bloiq is reader-supported. Some links may earn us a commission; it never affects what we write. How we make money.
Cover photo: Simon Eugster, CC BY-SA 3.0, via Wikimedia Commons